Microsoft Word Formatting Tips

Microsoft Word Formatting Tips*
(*and Excel, and Publisher, and Power Point too)
Ever have trouble positioning a picture in a Word document? Ever have trouble emailing a document because it is too large? Microsoft provides tools for compressing large documents, based upon your target media. See tips below:
I want to...
Position Photos in Documents
You can tell Word how you want your photo to appear in the document. Simply select the photo and choose your layout option. In Office 2003 it's called "Format Picture", in Word 2007 it's called "Text Wrapping".
How to wrap text with: Office 2003 Office 2007 Office 2016
Word 2003 Text Wrapping
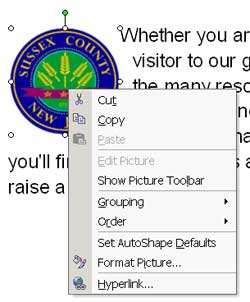
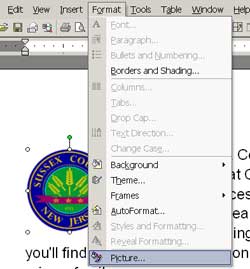
Right click the image, choose Format Picture..., or on the top menu choose Format, then Picture...
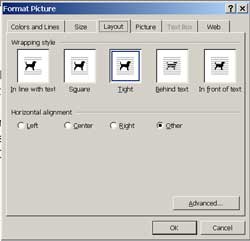
Click the Layout tab and choose a Wrapping style.
Word 2007 Text Wrapping
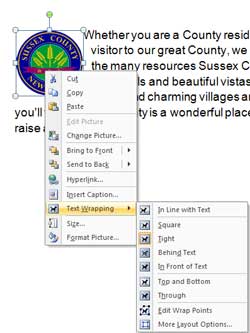
Right click the image, choose Text Wrapping, then choose your Wrapping style, or on the top menu choose Format, then Text Wrapping, then choose a Wrapping style.
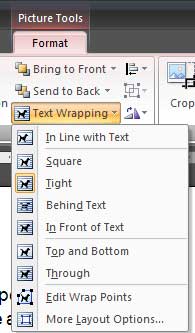
Word 2016 Text Wrapping
On the top menu, click Format, click on the Wrap Text icon, and choose a wrapping style.
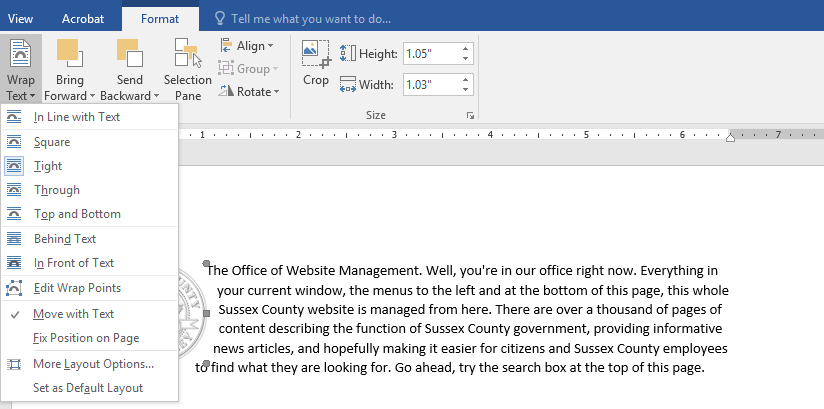
Text Wrapping Examples


Compress Documents
You can tell Word, Publisher, Excel and PowerPoint to compress your photos to reduce the file size.
Today's digital cameras produce huge picture files. When those pictures are inserted in documents, the documents themselves become very large. Using the supplied picture formatting tools you can crop, then compress your photos.
Image Compression
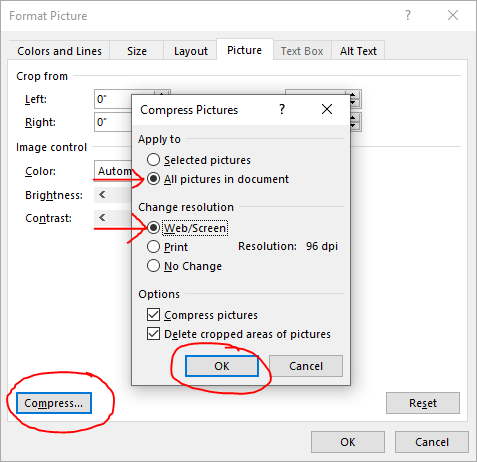
Image compression is a great way to reduce the file size of an image in order to send it via email. To get started, right click the image, choose Format AutoShape/Picture, click the Picture tab, click on Compress, select All pictures in document, select Web/Screen, check Compress pictures and Delete cropped areas of pictures, then click OK.
Send questions to feedback@sussex.nj.us.
Office of Web Site Management

